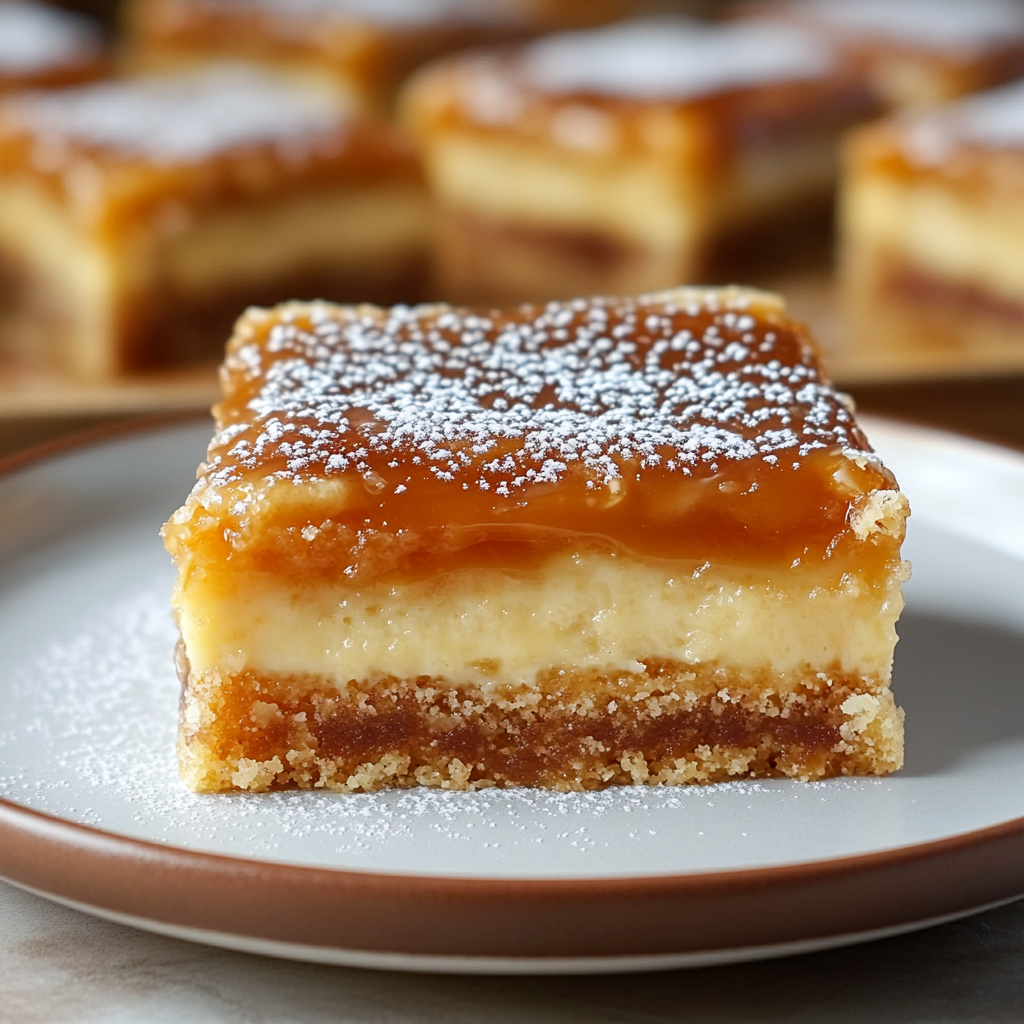
Irresistible Ooey Gooey Salted Caramel Butter Cake Bars
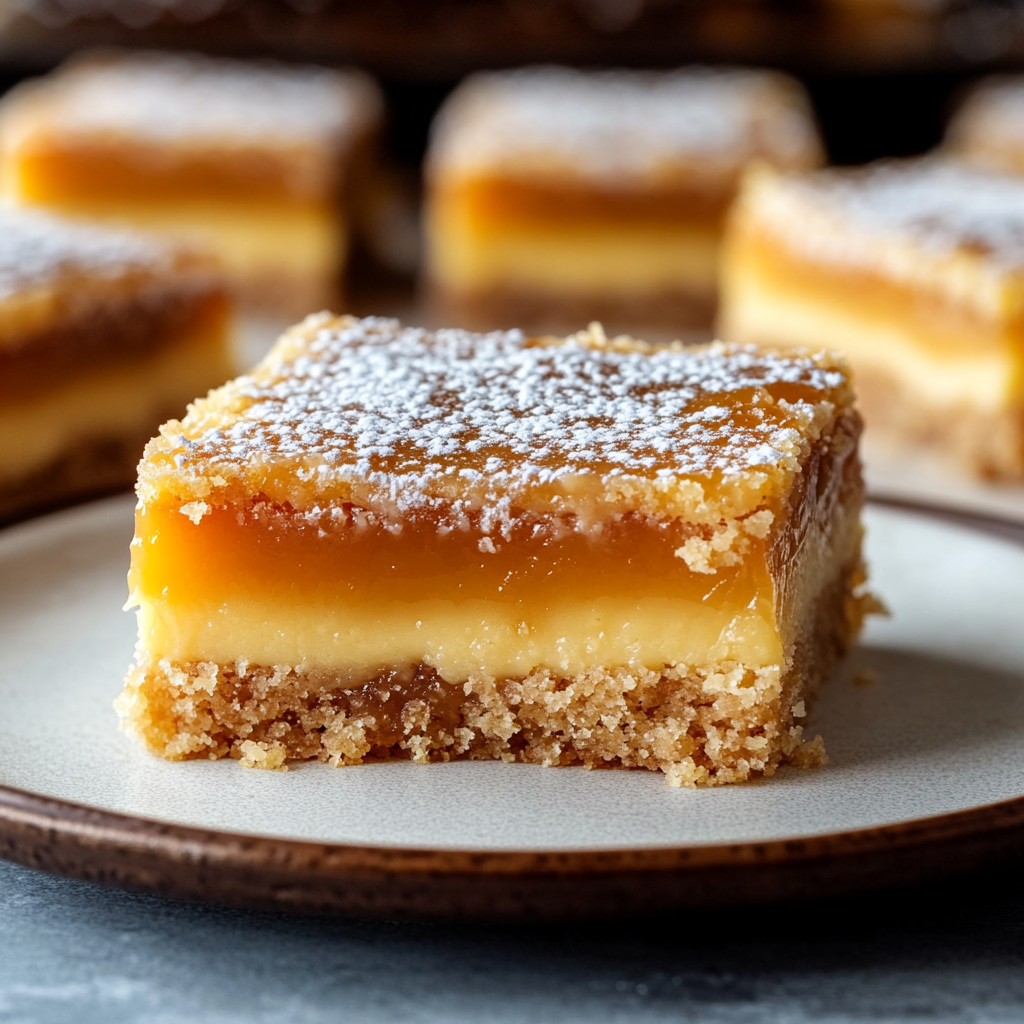
Hey there, fellow dessert enthusiast! Today, I’m excited to share a recipe that never fails to impress—Irresistible Ooey Gooey Salted Caramel Butter Cake Bars. Picture this: a decadent blend of buttery goodness, sweet caramel, and a hint of salt that creates a symphony of flavors in every bite.
Why You’ll Love This
These bars are my go-to when I need a dessert that’s equal parts comforting and indulgent. I make this when I want to treat myself after a long day or when friends come over for a sweet surprise. My family goes crazy for this because, let’s be honest, who can resist the magic of butter, caramel, and a touch of salt in a single bite?
Now, let’s talk ingredients. You’ll need the usual suspects like flour, sugar, and eggs, but the star of the show here is the gooey caramel that takes these bars to the next level. I sometimes use sea salt instead of regular salt to add an extra dimension of flavor, but feel free to experiment based on your taste preferences.
When it comes to making these bars, don’t worry too much about precision. Baking should be fun and flexible, so if you feel like adding a bit more caramel or sprinkling some extra sea salt on top, go for it! This is your chance to get creative in the kitchen.
This is where I usually sneak a taste of the batter because, let’s face it, who can resist raw cookie dough? Embrace the messiness of baking—licking the spoon is a mandatory step in my kitchen!
Directions
Preheat your oven and line your baking pan with parchment paper. In a mixing bowl, cream together the butter and sugar until light and fluffy. Add in the eggs one at a time, mixing well after each addition. Slowly incorporate the flour until just combined.
Now comes the fun part—pour half of the batter into the pan and spread it evenly. Drizzle a generous amount of caramel over the batter, then top it off with the remaining batter. Pop it in the oven and bake until the top is golden brown and a toothpick inserted comes out clean.
Don’t worry if it looks a bit weird at this stage—it always does! Baking is full of surprises, and sometimes the most imperfect-looking treats turn out to be the most delicious ones.
Once the bars are baked to perfection, let them cool slightly before cutting into squares. I find that these bars taste even better the next day when the flavors have had time to meld together. Although, in my house, they never last more than a day!
Notes
Through trial and error, I’ve discovered that using high-quality caramel makes a world of difference in these bars. While store-bought caramel works in a pinch, homemade caramel elevates the flavor to a whole new level. Trust me, it’s worth the extra effort!
Variations
As an avid experimenter in the kitchen, I’ve tried various twists on this recipe. One variation that didn’t work out so well was substituting the butter with margarine—it lacked that rich, buttery flavor that makes these bars so irresistible.
Feel free to customize these bars to your liking. Add a sprinkle of nuts for extra crunch, or swap the caramel for chocolate for a decadent twist. The beauty of baking is that you can make it your own!

Irresistible Ooey Gooey Salted Caramel Butter Cake Bars
Decadent bars featuring a blend of buttery goodness, sweet caramel, and a hint of salt that creates a symphony of flavors in every bite. Perfect for indulging and comforting moments, these bars are a delightful treat for any occasion.
Ingredients
- 1 cup butter, softened
- 1 cup sugar
- 2 eggs
- 2 cups all-purpose flour
- 1 cup caramel sauce (homemade or high-quality store-bought)
- Sea salt or regular salt, for sprinkling
Directions
-
Preheat the oven and line a baking pan with parchment paper.
-
In a mixing bowl, cream together butter and sugar until light and fluffy. Add eggs one at a time, mixing well after each addition. Slowly incorporate flour until just combined.
-
Pour half of the batter into the pan and spread it evenly. Drizzle a generous amount of caramel over the batter, then top it off with the remaining batter.
-
Bake until the top is golden brown and a toothpick inserted comes out clean.
-
Let the bars cool slightly before cutting into squares. For best flavor, enjoy the bars the next day once the flavors have melded together.